Key takeaways
- Use DisplayPort for the most reliable adaptive sync on a desktop GPU.
- Choose a VESA-certified cable rated for your refresh rate.
- Connect to the GPU output, never the motherboard.
Variable refresh rate technology—NVIDIA’s G-Sync and AMD’s FreeSync—is the single biggest smoothness upgrade you can get without spending a dime, and yet countless gamers own a compatible monitor and never turn it on. When enabled, your display refreshes in sync with your GPU’s frame output, eliminating both screen tearing and the stutter caused by fixed-refresh mismatches. The result is buttery motion even when your frame rate fluctuates. In 2026, nearly every gaming monitor supports one or both standards, so the only thing standing between you and tear-free gaming is a few settings.
This guide walks through confirming compatibility, connecting correctly, enabling the feature in your GPU control panel and on the monitor, and the crucial companion settings that make it work flawlessly. It takes about ten minutes and, once done, you will wonder how you ever played without it. The setup differs slightly between NVIDIA and AMD, and this guide covers both.
Our top picks
 ASUS TUF Gaming Series 5 24.5” 1080P
- High-Performance Display: 24.5-inch Full HD (1920x1080) Fast IPS…
- Ultra-Fast Response Time: ASUS Fast IPS technology enables…
- Adaptive Sync Technology: FreeSync Premium and G-Sync compatible…
 INNOCN 24.5" 1440P 240Hz Gaming Monitor Fast
- Super Fast IPS 1440p Gaming Monitor 240Hz &…
- High Image Quality QHD 1440P Computer Gaming Monitor:…
- HDMI + DisplayPort Connectivity: This INNOCN PC gaming…
| Product | Key specs | |
|---|---|---|
 Samsung 27” Odyssey OLED G5 Samsung 27” Odyssey OLED G5 | Check price | |
| ASUS TUF Gaming Series 5 24.5” 1080P | High-Performance Display: 24.5-inch Full HD (1920x1080) Fast IPS… Ultra-Fast Response Time: ASUS Fast IPS technology enables… Adaptive Sync Technology: FreeSync Premium and G-Sync compatible… | Check price |
| INNOCN 24.5" 1440P 240Hz Gaming Monitor Fast | Super Fast IPS 1440p Gaming Monitor 240Hz &… High Image Quality QHD 1440P Computer Gaming Monitor:… HDMI + DisplayPort Connectivity: This INNOCN PC gaming… | Check price |
 CUNPU 24 Inch 1080P 200Hz Gaming Monitor CUNPU 24 Inch 1080P 200Hz Gaming Monitor | Compact But Powerful Performance: Cunpu 24-inch gaming monitor… Fast IPS Visual Advantage: A New Generation of… Elite Gaming Performance: It is compatible with FREESYNC… | Check price |
 Capshi 8K 4K DisplayPort Cable 1.4 Capshi 8K 4K DisplayPort Cable 1.4 | 8K DisplayPort Cable 1.4: This VESA Certified DP… Multi-functional Support: The 8K DisplayPort cable supports video… Advanced Technology: The cable delivers enhanced bandwidth via… | Check price |
| Capshi 8K 4K DisplayPort Cable 1.4 | 8K DisplayPort 1.4 Cable: This VESA Certified DP… Multi-functional Support: The 8K DisplayPort cable supports video… Advanced Technology: The cable delivers enhanced bandwidth via… | Check price |
 KTC 32 Inch Curved Gaming Monitor KTC 32 Inch Curved Gaming Monitor | 【Clear Image Quality】32 inch curved monitor adopts VA… 【Excellent Color】Provides 350cd/m² brightness, 3000:1 dynamic contrast ratio… 【165Hz Gaming Monitor】Ultra-fast 165Hz refresh rate displays smooth… | Check price |
 KTC 27 Inch 240Hz Curved Gaming Monitor KTC 27 Inch 240Hz Curved Gaming Monitor | [Ultra-smooth 240Hz Refresh Rate] 240Hz refresh rate delivers… [More Immersive 1000R Curved Screen] The 1000R Curved… [Crysyal Visuals with 1440p Monitor] This 27 inch… | Check price |
As an Amazon Associate we earn from qualifying purchases at no extra cost to you.
⚡ Save on Your Next PC — Amazon Prime
Prime members get fast free shipping on the systems above, plus early access to Prime Day & Black Friday PC deals. New members get a 30-day free trial.
Watch: How to Enable G-Sync or FreeSync — Video Review
Confirm Your Hardware Supports It
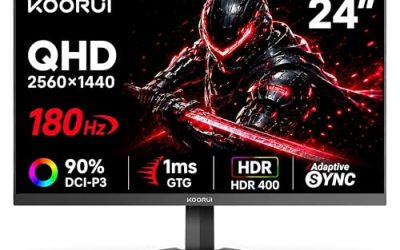
First, check that your monitor supports variable refresh—look for G-Sync, G-Sync Compatible, or FreeSync in its spec sheet or on-screen menu. A monitor like the Samsung Odyssey OLED G5 or an ASUS TUF Gaming panel supports adaptive sync out of the box. Then match it to your GPU: NVIDIA cards drive G-Sync and G-Sync Compatible displays, while AMD cards drive FreeSync. The good news is that most FreeSync monitors are also G-Sync Compatible, so the two ecosystems increasingly overlap.
Connect With the Right Cable and Port
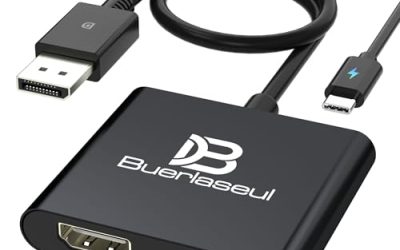
Variable refresh works best over DisplayPort, and a quality certified cable like a VESA-certified DisplayPort 1.4 cord ensures the bandwidth for high refresh rates and adaptive sync together. HDMI 2.1 also carries VRR, but DisplayPort is the most reliable path on desktop GPUs. Plug into the graphics card, not the motherboard, and confirm the cable is rated for your panel’s resolution and refresh—a substandard cable can silently disable the feature.
- Use DisplayPort for the most reliable adaptive sync on a desktop GPU.
- Choose a VESA-certified cable rated for your refresh rate.
- Connect to the GPU output, never the motherboard.
Enable It on the Monitor
Many monitors ship with adaptive sync turned off in their on-screen menu. Open the monitor’s OSD, find the Adaptive Sync, FreeSync, or G-Sync toggle, and switch it on. Some panels also offer a FreeSync Premium or Premium Pro mode—enable the highest tier your monitor supports. This step is easy to miss because the GPU-side setting can appear active while the monitor quietly ignores it.
Enable It in the GPU Control Panel
On NVIDIA, open the NVIDIA Control Panel, go to “Set up G-SYNC,” check “Enable G-SYNC, G-SYNC Compatible,” and apply it to your display. On AMD, open Adrenalin software, go to the display settings, and toggle AMD FreeSync on. Verify it is active—NVIDIA shows a G-Sync indicator overlay you can enable to confirm it is running during a game.
Set the Companion Settings Correctly
Variable refresh alone is not enough—the magic combination is G-Sync/FreeSync ON, V-Sync ON in the GPU control panel (not in-game), and a frame rate cap set 3-4 fps below your monitor’s maximum refresh. The V-Sync setting here acts as a backstop to prevent tearing at the top of the refresh range, while the frame cap keeps you inside the variable refresh window where the technology operates. This trio delivers zero tearing, minimal latency, and perfect pacing.
Tips
- Cap your frame rate 3-4 fps below max refresh (e.g., 140 on a 144Hz panel) to stay in the VRR window.
- Enable V-Sync in the GPU control panel, not in-game, when using adaptive sync.
- Turn on the G-Sync indicator overlay to confirm it is actually running.
- Update your GPU driver and monitor firmware for the best VRR compatibility.
Frequently Asked Questions
Can I use a FreeSync monitor with an NVIDIA GPU?
Usually yes. Most FreeSync monitors are also certified or work as G-Sync Compatible, so an NVIDIA card can drive their variable refresh. Enable it in the NVIDIA Control Panel under “Set up G-SYNC.” A minority of FreeSync panels are not officially validated, but many still work—you can force-enable and test for flicker.
Should V-Sync be on or off with G-Sync/FreeSync?
Turn V-Sync ON in the GPU control panel, not in-game. Within the variable refresh range, G-Sync or FreeSync handles synchronization. V-Sync acts as a safety net to prevent tearing if your frame rate exceeds the panel’s max refresh. Combined with a frame cap just below max refresh, this gives the smoothest, lowest-latency result.
Why do I need to cap my frame rate?
Adaptive sync only works within your monitor’s refresh range. If your frame rate exceeds the maximum, you fall out of the VRR window and tearing or added latency returns. Capping 3-4 fps below max refresh keeps every frame inside the window where G-Sync or FreeSync operates, ensuring consistently smooth, tear-free motion.
How do I know G-Sync is actually working?
Enable the G-Sync indicator overlay in the NVIDIA Control Panel’s display menu, then launch a game—it shows on screen when G-Sync is active. On AMD, FreeSync status appears in the Adrenalin overlay. You should also see tearing disappear and motion feel smoother during frame-rate fluctuations compared to a fixed-refresh setup.
Conclusion
Enabling G-Sync or FreeSync is a ten-minute setup that permanently eliminates tearing and stutter. Confirm your monitor and GPU are compatible, connect over a quality DisplayPort cable, turn the feature on both in the monitor’s menu and the GPU control panel, then set the winning combination of VRR on, V-Sync on, and a frame cap just below max refresh. Do it once and every game you play looks measurably smoother.