Key takeaways
- Screwdriver: A standard Phillips head is all you need for the mounting screw.
- Mounting screw or clip: Many boards now use a tool-less latch; older ones need the small screw.
- Anti-static care: Touch a metal part of the case to discharge static before handling components.
Adding an M.2 NVMe SSD is one of the fastest and most satisfying upgrades you can perform on a PC. These tiny gumstick-sized drives deliver blistering speeds, slash game load times, and install in minutes with a single screw, no cables required. Whether you are adding storage for a growing game library or installing a fresh drive for a new build, the process is genuinely beginner-friendly.
This guide walks you through installing an M.2 NVMe SSD step by step, from finding the right slot to securing the drive and getting it recognized by Windows. With a modern drive like a Samsung 990 PRO or WD_Black SN8100, you will be enjoying near-instant loads in no time.
Our top picks
 Samsung SSD 990 PRO 2TB
- Consider this a cheat code
- Gen4 steps up with faster transfer speeds and…
- The speed you need for any occasion
 ASTARON M.2 SSD Screws Kit
- 【Widely Compatible】- The kit is compatible with various…
- 【NVMe SSD Quantity】-Studs of different heights*8、Screws*8,Black Carabiner*2, Magnetic…
- 【Magnetic screwdriver】-Since M2 screws are too small, we…
 46PCS NVME M.2 SSD Mounting Screws M.2
- 【M.2 computer screw】:easy installation with motherboard screw,standoff to…
- 【Ssd screw with screwdriver】:magnetic screwdriver prevent tiny screw,standoff…
- 【Durable material】:computer screw,standoff and screwdriver are made of…
| Product | Key specs | |
|---|---|---|
| Samsung SSD 990 PRO 2TB | Consider this a cheat code Gen4 steps up with faster transfer speeds and… The speed you need for any occasion | Check price |
| ASTARON M.2 SSD Screws Kit | 【Widely Compatible】- The kit is compatible with various… 【NVMe SSD Quantity】-Studs of different heights*8、Screws*8,Black Carabiner*2, Magnetic… 【Magnetic screwdriver】-Since M2 screws are too small, we… | Check price |
| 46PCS NVME M.2 SSD Mounting Screws M.2 | 【M.2 computer screw】:easy installation with motherboard screw,standoff to… 【Ssd screw with screwdriver】:magnetic screwdriver prevent tiny screw,standoff… 【Durable material】:computer screw,standoff and screwdriver are made of… | Check price |
 SANDISK 500GB Optimus 5100 NVMe SSD SANDISK 500GB Optimus 5100 NVMe SSD | SPEED UP PROJECTS CREATE AND STORE MORE IT GOES WHERE YOU GO | Check price |
 WD_Black SN8100 2TB NVMe SSD WD_Black SN8100 2TB NVMe SSD | This product has been replaced by our latest… EXPERIENCE PCIe Gen 5: Drastically enhance your gaming… Your drive reaches sequential read speeds up to… | Check price |
 SIX NVME M.2 SSD PCIe 4.0-1TB m.2 SIX NVME M.2 SSD PCIe 4.0-1TB m.2 | Unleash Upgraded power - Employing PCIe Gen4x4 High… Work and Play - Whether you pursue science… Match ur Next-level M.2 SSD - Compatibility ready… | Check price |
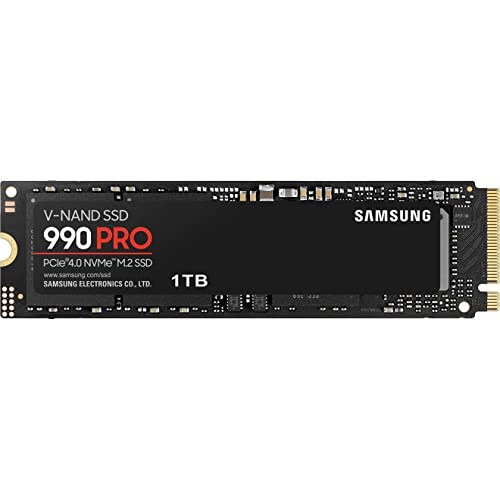 Samsung SSD 990 PRO 1TB Samsung SSD 990 PRO 1TB | Get random read/write speeds that are 40%/55% faster… Use less power and get more performance Samsung's own nickel-coated controller delivers effective thermal control | Check price |
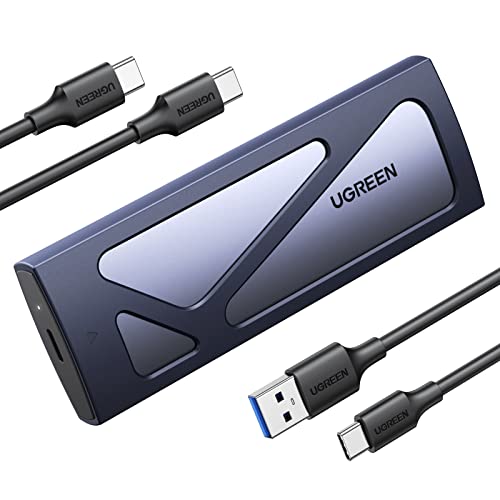 UGREEN SSD Enclosure Tool-Free USB C External UGREEN SSD Enclosure Tool-Free USB C External | 10Gbps NVMe Enclosure: With the latest USB 3.2… Tool-free SSD Enclosure: Tool-free NVMe SSD enclosure for… Broad Compatibility: The UGREEN M.2 NVMe SSD enclosure… | Check price |
As an Amazon Associate we earn from qualifying purchases at no extra cost to you.
⚡ Save on Your Next PC — Amazon Prime
Prime members get fast free shipping on the systems above, plus early access to Prime Day & Black Friday PC deals. New members get a 30-day free trial.
Watch: How to Install an M.2 NVMe SSD — Video Review
Gather Your Tools and Check Compatibility
You need very little: a Phillips screwdriver, your M.2 drive, and the tiny mounting screw, which usually comes with your motherboard or in a small screw kit. Before buying, confirm your motherboard has a free M.2 slot and that it supports the drive’s interface, PCIe Gen4 or Gen5, and length, almost always the 2280 size for desktops. A quick look at your motherboard manual settles this.
- Screwdriver: A standard Phillips head is all you need for the mounting screw.
- Mounting screw or clip: Many boards now use a tool-less latch; older ones need the small screw.
- Anti-static care: Touch a metal part of the case to discharge static before handling components.
Locate and Prepare the M.2 Slot
Find the M.2 slot on your motherboard, a short horizontal connector usually labeled M.2, often hidden under a heatsink cover. Remove the heatsink screws and set the cover aside, peeling off any plastic film on the thermal pad underneath. If your board has multiple slots, check the manual for which one is fastest and whether using certain slots disables SATA ports.
Insert the Drive at an Angle
Hold the SSD by its edges and slide the connector into the slot at roughly a 30-degree angle. It should slot in smoothly with light pressure, never force it. The drive will stick up at an angle once seated. Make sure the gold contacts are fully inserted so only the notch and screw hole are visible above the slot.
Secure It and Replace the Heatsink
Gently press the raised end of the drive down flat toward the standoff, then secure it with the mounting screw or engage the tool-less latch. Do not overtighten, the screw only needs to be snug. Replace the motherboard’s M.2 heatsink over the drive, which helps a fast NVMe SSD sustain its speeds under load, and screw the cover back down.
Initialize the Drive in Windows
Power on and enter the BIOS to confirm the drive is detected, which verifies your physical install. If this is a secondary drive, boot into Windows, right-click the Start button, and open Disk Management. Windows will prompt you to initialize the new disk, usually with GPT, after which you create a new volume, assign a drive letter, and format it. It then appears in File Explorer ready to use.
Tips
- Peel the thermal pad film: Forgetting to remove the plastic film blocks heat transfer to the heatsink.
- Use the fastest slot: The CPU-connected M.2 slot is usually faster than chipset slots for your boot drive.
- Do not overtighten: The mounting screw is tiny; snug is enough and prevents cracking the drive.
- Update to the latest BIOS: Newer firmware ensures the best compatibility with recent Gen4 and Gen5 drives.
Frequently Asked Questions
Do I need to install drivers for an NVMe SSD?
Generally no. Windows 10 and 11 include native NVMe drivers, so the drive works as soon as you initialize and format it. You can optionally install the manufacturer’s software, like Samsung Magician, for firmware updates and monitoring, but it is not required to use the drive.
Which M.2 slot should I use?
Use the slot connected directly to the CPU for your primary or boot drive, as it typically offers the highest bandwidth. Check your motherboard manual, since some chipset-connected slots run slower or share bandwidth with SATA ports, disabling them when populated.
Why isn’t my new SSD showing up?
If it is a fresh drive, it likely just needs initializing in Disk Management before it appears in File Explorer. Also confirm it is detected in the BIOS first, and if not, reseat the drive, make sure it is fully inserted, and verify the slot supports your drive type.
Do M.2 SSDs need a heatsink?
Fast Gen4 and Gen5 drives run warm and can throttle under sustained heavy writes, so a heatsink helps them maintain peak speeds. Many motherboards include an M.2 heatsink cover, which is usually sufficient. For gaming loads, cooling is helpful but rarely critical for everyday use.
Conclusion
Installing an M.2 NVMe SSD is a quick, cable-free upgrade that pays off with dramatically faster load times and storage speeds. Confirm compatibility, seat the drive at an angle, secure it with a single screw, replace the heatsink, and initialize it in Windows. In under fifteen minutes you will have a snappier system and plenty of room for your games, all with one of the easiest upgrades in PC building.