Key takeaways
- Left Paddle: Map this to Jump (typically ‘A’ on Xbox layout or ‘Cross’ on PlayStation layout) or Dash. This allows you to navigate vertical terrain without removing your right thumb from the aiming stick.
- Right Paddle: Map this to Crouch, Slide, or Interact (typically ‘B’ or ‘Right Bumper’).
A clean gaming desk setup is the centerpiece of the modern home entertainment space, but even the most ergonomic chair and high-refresh-rate monitor cannot salvage your gameplay if your input devices are poorly configured. Back paddles on PC gamepads are designed to keep your thumbs firmly planted on the analog sticks, eliminating the millisecond delays caused by reaching for face buttons like A, B, X, and Y.
However, if you map your back paddles incorrectly, or skip the calibration process in your companion software, you risk a highly frustrating user experience. Poorly mapped buttons lead to accidental inputs, severe wrist and hand strain during long sessions, and disrupted muscle memory that can take weeks to unlearn. Configuring your controller’s companion software correctly ensures seamless, ergonomic control that complements your physical space and enhances your reaction times.
As an Amazon Associate we earn from qualifying purchases at no extra cost to you.

What You Need
To get started with mapping your controller’s paddles on a PC running Windows 10 or 11 in 2026, you will need a few physical items and the correct software installed. Below is a breakdown of what to prepare before you begin the configuration process.
| Item | Why | Optional? |
|---|---|---|
| Mappable PC Gamepad | The primary input device featuring physically integrated rear buttons or removable paddles (typically weighing between 8 and 10.5 ounces). | No |
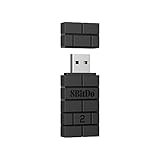
| USB-C Connection Cable | An 8-foot to 10-foot cable ensures a low-latency connection required for firmware updates and initial software calibration. | Yes (if using a wireless dongle, though wired is recommended for setup) |
| Companion Configuration Software | The dedicated app (such as the PDP Control Hub or Steam Controller Settings) that translates physical paddle clicks into PC commands. | No |
| PC Running Windows 10/11 | The host system needed to run the configuration software and process the controller’s input API. | No |
Step-by-Step
Follow these steps to successfully map your back paddles using your gamepad’s dedicated PC software. This entire process takes approximately 15 to 20 minutes to complete.
Step 1: Install the Companion Software (Estimated Time: 3 – 5 minutes)
Do not rely on default Windows drivers if you want to use advanced paddle mapping. Visit the manufacturer’s official website or the Microsoft Store to download the dedicated companion application. For example, if you are using an customizable controller like the PDP Gaming REMATCH GLOW Enhanced Wired Controller, you will download the PDP Control Hub app. Install the software and launch it with administrator privileges to ensure it can write profile files directly to your storage drive.
Step 2: Connect the Controller and Update Firmware (Estimated Time: 2 – 4 minutes)
Connect your controller to a high-speed USB port directly on your PC’s motherboard (avoid unpowered USB hubs, which can cause dropouts). Once connected, the companion software should automatically detect the gamepad. If a prompt appears indicating a firmware update is available, run it immediately. Keeping the firmware updated prevents communication errors between the physical paddles and the PC software layer.
Step 3: Access the Button Mapping Interface (Estimated Time: 2 minutes)
Navigate to the “Rebinding,” “Button Mapping,” or “Profiles” section within the software interface. You will typically see a 3D rendering of your controller. Rotate the model within the software to expose the rear paddles. Click on the specific paddle you wish to map (usually labeled as P1/P2 or M1/M2) to open its drop-down assignment menu.
Step 4: Assign and Map the Rear Paddles (Estimated Time: 5 minutes)
For the best ergonomic results, map actions that require simultaneous camera control.
- Left Paddle: Map this to Jump (typically ‘A’ on Xbox layout or ‘Cross’ on PlayStation layout) or Dash. This allows you to navigate vertical terrain without removing your right thumb from the aiming stick.
- Right Paddle: Map this to Crouch, Slide, or Interact (typically ‘B’ or ‘Right Bumper’).
Select the physical button from the software’s interactive map to link it to the corresponding paddle. Avoid mapping complex keyboard macros to your paddles unless your game’s terms of service explicitly allow it, as this can trigger anti-cheat software flags.
Step 5: Calibrate Deadzones and Trigger Sensitivity (Estimated Time: 3 minutes)
While still in the software configuration tool, navigate to the “Triggers” and “Sticks” tabs. Because back paddles change how tightly you grip the controller body, you may find yourself accidentally putting slight pressure on the triggers or analog sticks. Increase your stick deadzones by 2% to 5% to prevent accidental movement drift, and ensure your triggers have a small initial deadzone so tight gripping doesn’t register as a partial trigger pull.
Step 6: Save and Test Your Profile (Estimated Time: 3 minutes)
Click “Save,” “Apply,” or “Sync to Controller.” Many modern controllers allow you to store up to three onboard profiles directly to the gamepad’s internal memory. Once saved, open a game or use an online controller tester to verify that pressing the rear paddles registers the exact inputs you assigned, without any dropped signals or double-press behaviors.
Mistakes to Avoid
- Using Duplicate Bindings on the Face Buttons: A common mistake is mapping the paddles but continuing to use the face buttons out of habit. To build muscle memory quickly, force yourself to use only the paddles for the mapped functions.
- Neglecting Profile Management: Do not use a single profile for every game genre. A paddle layout optimized for a first-person shooter will feel clunky and counterintuitive in a racing game or a platformer. Create and label distinct profiles within your companion software.
- Over-tightening Hands During Calibration: When mapping paddles, hold the controller with your natural, relaxed gaming grip. If you map buttons while holding the controller too tightly, you will likely suffer from hand fatigue and accidental paddle clicks during intense gameplay moments.
- Running Conflicting Software: Avoid running Steam Input configuration simultaneously with proprietary manufacturer software (like the PDP Control Hub). Running both at the same time can cause double-input bugs, where a single paddle press triggers two actions at once.
How Often
You should review and maintain your controller’s software settings and physical state on a regular schedule to keep performance optimal:
- Every Month: Check the companion software for app and firmware updates. These updates patch security vulnerabilities and fix compatibility issues with newly released PC games.
- Every 3 Months: Recalibrate your analog sticks and paddle response curves inside the software. Over time, mechanical wear can slightly alter the physical actuation point of the paddles.
- Every 6 Months: Clean the physical paddle housings using a can of compressed air and a microfiber cloth dampened with 70% isopropyl alcohol. Sweat and skin oils can seep into the microswitches under the paddles, causing sticky buttons or double-inputs.
When to Call a Pro or Replace
Most modern PC gamepads are highly durable, but they are generally not serviceable by the average user due to delicate ribbon cables and soldered microswitches.
If you experience physical paddle failure—such as a paddle that no longer “clicks,” feels completely mushy, or fails to register inputs even after a full software reset—it is time to replace the unit. Additionally, if the software’s calibration screen shows stick drift exceeding 15% that cannot be corrected by adjusting deadzones, the internal potentiometers have worn out.
Replacing a controller is often highly cost-effective. High-quality wired options with built-in mapping software, audio control, and customized aesthetics (such as the PDP Gaming REMATCH GLOW line) typically range from $35 to $50, while premium wireless elite controllers can range from $130 to over $180. If your controller is still within its manufacturer warranty period (typically 1 to 2 years), contact customer support for a replacement rather than attempting to open the shell yourself, which voids the warranty.
FAQ
Why isn’t my PC software detecting my gamepad’s back paddles?
This usually occurs if the controller is connected to an unpowered USB port or if Windows is using a generic USB driver. Try plugging the controller directly into a USB 3.0 port on the back of your computer tower. Additionally, ensure you have closed conflicting programs like Steam or Discord, which can occasionally hijack controller inputs before the proprietary companion app can read them.
Can I map keyboard keys to my controller’s back paddles?
Yes, but this depends entirely on the companion software you are using. Advanced software suites allow you to map keyboard keys (like ‘R’ for reload or ‘Spacebar’ for jump) directly to the paddles. If your controller’s native software does not support this, you can run Steam Input or a third-party remapper tool to bridge the gap.
Do back paddles cause input lag on PC?
No, mapping back paddles does not add noticeable latency. Because the paddles map directly to existing controller inputs at the hardware level, the signal processing time is identical to pressing a standard face button. To minimize overall input lag, use a wired USB connection rather than a standard Bluetooth connection.
What are the best buttons to map to my paddles for competitive shooters?
The standard competitive configuration is to map the left paddle to Jump and the right paddle to Crouch/Slide. This layout allows you to perform complex movement mechanics, such as jump-shotting or slide-canceling, without ever taking your thumb off the right analog stick to aim.