Key takeaways
- Using USB 2.0 Ports: Avoid plugging your high-speed link cable into black USB 2.0 ports. These legacy ports cap data transfer speeds at 480 Mbps, which causes heavy visual compression, lag, and connection drops. Always use USB 3.0 (SuperSpeed) ports.
- Sharing the Wi-Fi Band: Do not run your wireless VR link on a Wi-Fi band shared with household smart TVs, phones, and gaming consoles. For smooth wireless VR, dedicate a 5GHz or 6GHz band exclusively to your headset.
- Neglecting GPU Driver Updates: Outdated graphics drivers are a primary cause of software crashes and failed handshakes between your PC and headset. Update your Nvidia or AMD drivers before launching the VR software.
- Stretching the Cable Tight: Never pull your 20-foot cable taut across your play area. Leaving no slack puts physical leverage on your headset’s delicate USB-C port, which can permanently damage the internal solder joints.
Integrating a high-end virtual reality setup into your home living space or dedicated game room is one of the most exciting upgrades you can make to your home entertainment ecosystem. However, balancing the physical aesthetics of your room with the technical demands of PC-based VR can be a challenge. To achieve ultra-low latency and stunning visual fidelity, you must configure both your wired and wireless connections properly.
If done poorly, a rushed installation leads to a host of frustrating issues. Physical cables sprawling across your floor create tripping hazards and risk damaging expensive PC ports or pulling your computer off its desk. On the technical side, an incorrect configuration causes severe packet loss, latency spikes exceeding 60 milliseconds, screen tearing, and sudden disconnections. This lag breaks immersion and rapidly induces vestibular mismatch—the dreaded motion sickness that can ruin your VR experience for hours. Understanding how to set up wireless pc vr link cable software ensures a clean, safe room aesthetic and a seamless, high-performance virtual reality experience.
Our top picks

As an Amazon Associate we earn from qualifying purchases at no extra cost to you. Ratings are shown as listed on Amazon.
What You Need
Before beginning the installation, gather the necessary hardware and software components. Balancing your budget between high-speed physical cables and robust wireless networking equipment ensures you are prepared for any style of gameplay.
| Item | Why You Need It | Optional? |
|---|---|---|
| VR Headset (Meta Quest 3/3S/2 or Pico 4) | The primary display device for your virtual reality environment. | No |
| VR-Ready Gaming PC | Renders the complex 3D graphics. Requires a dedicated GPU with at least 8GB of VRAM and an Intel i5/AMD Ryzen 5 processor or higher. | No |
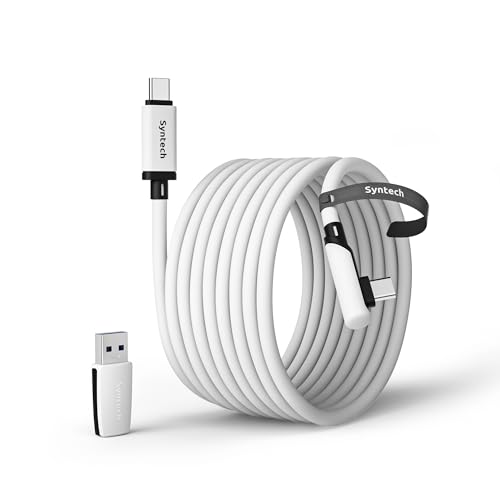
| High-Speed VR Link Cable (e.g., Syntech 20FT or Maxonar 20FT) | Provides a stable, high-bandwidth (up to 5Gbps) physical connection for seated experiences or long play sessions. Syntech is priced around $25.99, while the Maxonar active charging cable is around $23.74. | Optional (but highly recommended for zero-latency gameplay and charging) |
| Wi-Fi 6 or 6E Router | Enables high-bandwidth, low-latency wireless streaming via 5GHz or 6GHz bands. Must be connected to the PC via a Cat6 Ethernet cable. | Yes (only required for wireless play) |
| PC VR Link Software (Meta Quest Link App or SteamVR) | The software bridge that translates your PC’s display output into a format your VR headset can interpret in real-time. | No |
| Cable Management Pulley System | Suspends the physical link cable from the ceiling to keep your floor space clear and prevent tripping. | Yes |
Step-by-Step
Follow these steps to configure your system for both wired link cable play and high-speed wireless streaming. This hybrid approach gives you the flexibility to choose between maximum graphical fidelity and complete physical freedom.
Step 1: Prepare Your Home Play Space and PC Hardware (Time: 10 minutes)
To prevent accidents, clear a dedicated physical space of at least 6.5 feet by 6.5 feet (2 meters by 2 meters). Ensure there are no coffee tables, low-hanging light fixtures, or pets nearby. Place your gaming PC on a stable desk or stand, ensuring that the rear and front USB ports are easily accessible. If you are using a wired setup, locate a USB 3.0 or USB-C port directly on your motherboard (usually color-coded blue, red, or teal) rather than using a front-panel hub, which can suffer from signal degradation. If you are using a ceiling pulley system, mount the adhesive hooks now to keep your 20-foot cable off the floor.
Step 2: Install and Configure the PC VR Link Software (Time: 15 minutes)
Turn on your PC and navigate to the official website of your headset manufacturer to download the connection software (such as the Meta Quest Link app). Run the installer and follow the on-screen prompts. Once installed, open the software and create or log into your account. Navigate to the “Devices” tab in the software settings. This hub acts as the control tower for both your physical link cable and your wireless air link connections, serving as the foundation of your home VR network.
Step 3: Establish the Wired Link Cable Connection (Time: 5 minutes)
Take your high-speed cable—such as the Syntech 20FT USB 3.0 cable ($25.99) or the Maxonar Charging Link Cable ($23.74)—and plug the Type-A or Type-C end into your PC’s dedicated USB 3.0 port. Plug the right-angle USB-C end into your headset. Use the included hook-and-loop strap to secure the cable to your headset’s strap, relieving tension from the USB-C port. Put on your headset, and a prompt will appear asking to “Enable Link.” Select “Enable.” The PC software will run a quick USB connection test; a successful test should show a green checkmark and a bandwidth speed of at least 1.5 Gbps to 2.4 Gbps.
Step 4: Configure the Wireless PC VR Link (Time: 10 minutes)
To cut the cord, make sure your gaming PC is connected directly to your router using a physical Cat6 Ethernet cable. Ensure your headset is connected to the 5GHz or 6GHz wireless band of your Wi-Fi 6 router; avoid the slower, congested 2.4GHz band. Inside your headset settings, navigate to the “Developer” or “Experimental” features tab (depending on your firmware version) and toggle on “Quest Link” or “Air Link.” Select your PC from the list of available local computers and click “Pair.” A pairing code will appear on both your headset and PC monitor; confirm they match to establish the secure wireless handshake.
Step 5: Calibrate Bandwidth and Graphics Settings (Time: 10 minutes)
As we look at the home entertainment landscape in 2026, high-resolution displays demand smart bandwidth allocation. Open the PC VR software on your desktop and navigate to the graphics settings for your connected headset. Set your refresh rate to a stable 90Hz (or 120Hz if your PC has a top-tier GPU). For wired play, you can set the encoded bitrate up to 400-500 Mbps for pristine visuals. For wireless play, open the in-headset Link overlay and set your bitrate to “Dynamic” with a maximum cap of 150-200 Mbps. This prevents sudden latency spikes if other smart devices in your home access the network.
Mistakes to Avoid
- Using USB 2.0 Ports: Avoid plugging your high-speed link cable into black USB 2.0 ports. These legacy ports cap data transfer speeds at 480 Mbps, which causes heavy visual compression, lag, and connection drops. Always use USB 3.0 (SuperSpeed) ports.
- Sharing the Wi-Fi Band: Do not run your wireless VR link on a Wi-Fi band shared with household smart TVs, phones, and gaming consoles. For smooth wireless VR, dedicate a 5GHz or 6GHz band exclusively to your headset.
- Neglecting GPU Driver Updates: Outdated graphics drivers are a primary cause of software crashes and failed handshakes between your PC and headset. Update your Nvidia or AMD drivers before launching the VR software.
- Stretching the Cable Tight: Never pull your 20-foot cable taut across your play area. Leaving no slack puts physical leverage on your headset’s delicate USB-C port, which can permanently damage the internal solder joints.
How Often
To keep your home VR theater running at peak performance, perform routine software and physical hardware maintenance. Update your PC’s graphics drivers and the VR link software once a month to ensure compatibility with new game releases. Inspect your physical link cable every two weeks; check for severe kinks, exposed wiring, or loose connector housings. If you use a wireless setup, restart your Wi-Fi router monthly to clear its cache and maintain optimal local data routing.
When to Call a Pro or Replace
If you experience frequent disconnects despite using USB 3.0 ports, run the software’s built-in cable test. If the test reveals speeds below 1.0 Gbps, or if the headset constantly toggles between charging and discharging, it is time to replace your cable. Investing in a durable replacement, such as the Maxonar 20FT cable with its next-gen smart chip ($23.74) or the rugged Syntech 20FT adapter cable ($25.99), is a cost-effective way to restore performance. If your home’s wireless network suffers from dead zones and persistent packet drops despite router restarts, consider hiring a home networking professional to install a wired access point directly in your ceiling or game room.
FAQ
Can I use any standard phone charging cable to link my PC and VR headset?
No. Most standard phone charging cables are designed for power delivery and only support USB 2.0 data transfer speeds (480 Mbps). To stream high-definition VR graphics, you need a high-quality USB 3.0 or higher cable capable of handling at least 5Gbps of data throughput.
Why is my wireless VR link lagging when my home internet speed is extremely fast?
Wireless PC VR streaming relies entirely on your *local* network speed (the speed at which your router communicates with your PC and headset), not your internet download speed. Even if your internet plan is slow, you can achieve a flawless wireless VR experience if your PC is wired to a high-quality Wi-Fi 6 router located in the same room as your headset.
Is a wired link cable better than a wireless link setup?
A wired link cable offers the highest visual fidelity, lowest latency, and consistent power delivery, making it ideal for simulation games and long play sessions. A wireless setup offers unparalleled physical freedom, which is perfect for active, room-scale games where cords can get tangled around your legs.
How do I keep my VR headset from running out of battery while playing?
Standard motherboard USB ports often output only 4.5W to 7.5W of power, which is not enough to keep a VR headset charged during use. To solve this, use an active charging link cable, like the Maxonar 20FT, which features a smart chip and an extra input port to inject up to 18W of power from your original wall charger while simultaneously transmitting data.