Key takeaways
- CPU socket matches the motherboard socket, and the BIOS version supports the CPU.
- RAM type (DDR4 or DDR5) matches the board, and the kit is on or near the motherboard’s qualified memory list.
- Case supports the board form factor, GPU length, cooler height and radiator size.
- PSU wattage covers the calculated load plus headroom, with every required connector.
- Boot drive is an M.2 NVMe or SATA SSD that the board has a slot for.
- A Windows licence plan exists (see the after-install stage).
- Monitor input matches the card output (DisplayPort or HDMI), and you own the cable.
- Return windows and serial numbers are noted for every part.
A good PC build checklist splits the project into five stages: before you order, before you assemble, during assembly, first boot, and after Windows is installed. Each stage has a short list of things that must be true before you move on, and skipping one is how most builds end up with a bent pin, a monitor plugged into the wrong port, or RAM running at half its rated speed. Use the tables below as a working gaming computer build checklist: tick a row, move to the next, and only then open the next box.
Our top picks
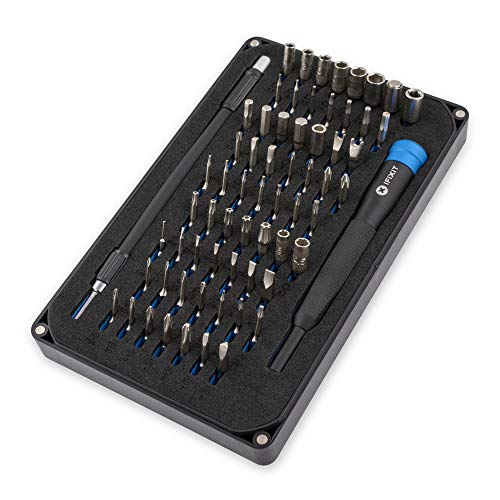


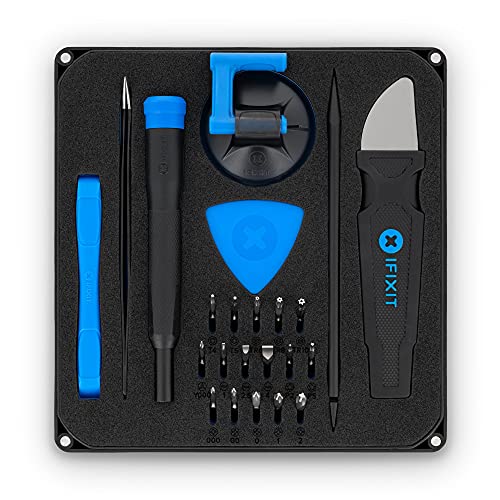
As an Amazon Associate we earn from qualifying purchases at no extra cost to you.
Quick answer
If you only read one section, read this one. The pc build order that avoids the most rework is:
- Lock compatibility on paper: CPU socket, motherboard chipset, RAM type, case size, cooler height, GPU length, PSU connectors.
- Stage the parts: unbox, inspect, and gather tools on a clean table.
- Build outside the case first: CPU, RAM, M.2 drive and cooler mounting on the motherboard while it sits on its box.
- Install and route: standoffs, I/O shield, board, PSU, cables, GPU last.
- Power on with the minimum: enter the BIOS, check RAM and drive detection, then install Windows and drivers.
| Stage | Goal | Typical time for a first build | Stop condition |
|---|---|---|---|
| 1. Before ordering | Parts that fit and work together | 1 to 3 hours of checking | Any red compatibility flag unresolved |
| 2. Before assembly | Everything on hand and inspected | 30 to 45 minutes | Missing cable, bent pin, damaged box |
| 3. During assembly | Parts mounted in a safe order | 2 to 4 hours | Anything that needs force |
| 4. First boot | POST, BIOS settings, OS install | 1 to 2 hours | No POST, no drive, wrong RAM speed |
| 5. After install | Drivers, updates, stress check, backup | 1 to 2 hours | Temperatures or crashes out of range |
The times are planning estimates for a careful first-timer, not measurements from any specific build.
Stage 1: The pre-order pc builder checklist
This is where a build is won or lost, because every mistake here costs a return shipment rather than a minute. The order of the checks matters. Start with the platform choices that constrain everything else, then work outward to the parts that only need to physically fit.
Platform compatibility: socket, chipset and memory
The CPU socket decides which motherboards are possible, and the motherboard decides the RAM type. Confirm all three against the manufacturer’s CPU support list on the motherboard’s product page, not just against a retailer listing. The table shows the main current desktop platforms as published by AMD and Intel.
| Platform | Socket | Memory type | Common chipsets | Notes |
|---|---|---|---|---|
| AMD Ryzen 7000, 8000 and 9000 desktop | AM5 | DDR5 only | A620, B650, B850, X870 | Land grid array socket: the contact pins are in the motherboard socket, so handle with care |
| Intel Core Ultra 200S | LGA1851 | DDR5 only | Z890, B860, H810 | Needs a board that explicitly lists LGA1851 |
| Intel 12th to 14th Gen Core | LGA1700 | DDR4 or DDR5, depending on the board | Z690, Z790, B660, B760, H610 | The board is built for one memory type, so buy matching RAM |
| AMD Ryzen 5000 and older | AM4 | DDR4 | B450, B550, X570 | Mature, but a dead end for upgrades |
Two compatibility traps deserve a line on the checklist. First, on LGA1700 the DDR4 and DDR5 slots are keyed differently, so the wrong kit will not fit, but it is still a wasted order. Second, an older board may need a BIOS update before it recognizes a newer CPU of the same socket. Check the motherboard maker’s CPU support page for the minimum BIOS version, and look for a BIOS Flashback or Q-Flash Plus button if you are unsure.
Physical fit: case, cooler, GPU and PSU
Once the platform is settled, check the dimensions that no software warns you about. Every one of these numbers appears on the manufacturer’s specification sheet.
| Check | Where to find the limit | Rule of thumb |
|---|---|---|
| Motherboard form factor | Case spec: ATX, micro-ATX, Mini-ITX support | A case supports its listed size and smaller ones |
| GPU length and slot width | Case “maximum GPU length”; card spec length and slot count | Leave at least 1 to 2 cm of margin at the front |
| CPU air cooler height | Case “maximum CPU cooler height”; cooler spec height | The cooler must be shorter than the limit, side panel included |
| Radiator size (AIO) | Case radiator support list by mounting position | Top mounts can collide with tall RAM or VRM heatsinks |
| PSU length | Case “maximum PSU length”; ATX or SFX standard | ATX PSUs vary in length; SFX needs a bracket in many ATX cases |
| Front I/O | Case front panel: USB-C, USB 3.0 header needs | Make sure the motherboard has a header for each front port |
| Storage mounting | M.2 slots on the board; drive bays in the case | Count slots before buying a second SSD |
Worked example: sizing the power supply
Power supply sizing is arithmetic, not guesswork. Take the maximum power figures from the manufacturers’ spec pages (often called TDP, TBP or “total board power”), add a margin, then round up to the next standard wattage. As an illustration, suppose a build uses a CPU rated for about 120 W under load and a graphics card rated for about 280 W board power.
| Item | Illustrative load |
|---|---|
| CPU under gaming load | 120 W |
| Graphics card board power | 280 W |
| Motherboard, RAM, SSD, fans, USB devices | 75 W |
| Subtotal | 475 W |
| Headroom for transient spikes and efficiency sweet spot (about 40 percent) | 190 W |
| Target PSU rating | About 665 W, so a 750 W unit is the next sensible size |
The 40 percent margin is a conservative planning figure that keeps a supply near the middle of its load range, where most units run efficiently and quietly. Graphics card makers also publish a recommended system power figure on the card’s page; use whichever number is higher. Then check connectors: the card’s power input (8-pin PCIe connectors or the 12V-2×6 connector, also written 12VHPWR in older material), the CPU’s 8-pin EPS lead, and enough SATA or peripheral outputs for your drives. If you are buying a new PSU for a card with a 12V-2×6 input, a supply marketed as ATX 3.1 includes a native cable, which avoids an adapter.
Pre-order sign-off
- CPU socket matches the motherboard socket, and the BIOS version supports the CPU.
- RAM type (DDR4 or DDR5) matches the board, and the kit is on or near the motherboard’s qualified memory list.
- Case supports the board form factor, GPU length, cooler height and radiator size.
- PSU wattage covers the calculated load plus headroom, with every required connector.
- Boot drive is an M.2 NVMe or SATA SSD that the board has a slot for.
- A Windows licence plan exists (see the after-install stage).
- Monitor input matches the card output (DisplayPort or HDMI), and you own the cable.
- Return windows and serial numbers are noted for every part.
Tools such as a parts-list compatibility checker catch socket and form-factor mismatches, but they cannot see every clearance issue or BIOS version requirement, so treat their green tick as a first filter and not a guarantee.
Stage 2: The pre-assembly checklist
When the boxes arrive, resist the urge to tear into them. Spend half an hour on staging. A messy desk is the origin of lost screws and dropped CPUs.
| Task | Why | Done? |
|---|---|---|
| Clear a large, flat, non-carpeted surface with good light | Reduces static and lost parts | [ ] |
| Use a #2 Phillips screwdriver; keep a small tray for screws | Most PC screws are Phillips #2; M.2 screws are smaller | [ ] |
| Inspect every box for damage; photograph serial numbers | Return and warranty claims | [ ] |
| Lay out the motherboard manual and case manual | Header pinouts and the standoff map are printed there | [ ] |
| Check the CPU socket for bent pins or debris (AM5 and LGA sockets have the pins in the socket) | A bent socket pin is the costliest early failure | [ ] |
| Confirm the cooler includes mounting hardware for your socket | Many coolers ship hardware for several sockets | [ ] |
| Download the BIOS update, chipset driver and Windows installer to a second computer | The new PC has no network driver until you install one | [ ] |
| Prepare a USB drive of 8 GB or larger for the Windows installer | Microsoft’s Media Creation Tool makes bootable media | [ ] |
Ground yourself by touching the bare metal of the case or the PSU before handling parts, and keep the PSU switched off and unplugged while you work. Most builders do not need an anti-static wrist strap, but avoid working on thick carpet or in socks on a dry day.
Stage 3: The assembly checklist, in order
The pc build order below puts the delicate and hard-to-reach work early, and the bulky or in-the-way parts late. The reason behind each step is included, because understanding it helps you adapt when your case differs from the diagram.
- Motherboard on its box: placing the board on the foam or box gives a stable surface and prevents scratches.
- CPU: lift the retention arm, align the triangle marker on the CPU with the one on the socket, lower it without pressure, then close the arm. Never push. If it does not sit flat, realign.
- RAM: fit the sticks into the slots your manual recommends for two modules (usually slots 2 and 4, counted from the CPU). Press until both clips click.
- M.2 SSD: insert at an angle, press flat, and fasten the small screw. Remove any heatsink film first, then fit the heatsink.
- CPU cooler: apply thermal paste only if the cooler does not have it pre-applied, using a pea-sized dot. Tighten screws in a cross pattern a little at a time. Plug the fan lead into the CPU_FAN header.
- Case preparation: install the I/O shield if the board does not have one built in, then check the standoffs match your board’s form factor and screw holes.
- Motherboard into case: lower the board onto the standoffs and fasten all screws finger-snug. The back of the board should never touch bare metal.
- Power supply: mount it with the fan facing the vent, and route the main cables before you stack other parts around them.
- Cables: the 24-pin main power, the CPU EPS 8-pin (sometimes 4+4) at the top of the board, then front-panel connectors, USB headers, audio and case fans.
- Graphics card last: remove the necessary slot covers, push the card into the top PCIe x16 slot until the latch clicks, screw it to the case, and connect its power cables.
Cable and header checklist
| Connector | Location | Common mistake |
|---|---|---|
| 24-pin ATX | Right edge of the motherboard | Not pressing until the clip locks |
| CPU 8-pin EPS (4+4) | Top left of the board | Plugging a PCIe GPU cable into it, or leaving it unconnected |
| GPU power (PCIe 8-pin or 12V-2×6) | Edge of the graphics card | A partly seated 12V-2×6 plug; push until it is fully flush and avoid sharp bends at the connector |
| Front panel (power switch, reset, LEDs) | Bottom right header, usually labeled in the manual | Reversed LED polarity or the power switch on the wrong pins |
| USB 3.x 19-pin and USB-C 20-pin | Bottom edge of the board | Forcing the keyed plug the wrong way |
| Front audio (HD Audio) | Bottom left of the board | Leaving it out and wondering where the headphone jack went |
| Fan headers (SYS_FAN, CPU_FAN, AIO_PUMP) | Various edges | Plugging an AIO pump into a regular fan header at low speed |
Stage 4: First boot checklist
Do not close the case yet. A first boot with the side panel open lets you see fans spinning and check connectors. Plug the monitor into the graphics card output, not the motherboard I/O, because when a dedicated card is installed the motherboard video ports are usually disabled or unused.
- Connect the power cord, switch the PSU on, and press the case power button.
- Look for fans spinning and the board’s debug LEDs or code display. A POST (power-on self-test) screen with the motherboard logo means the core parts work.
- Enter the BIOS (usually Delete or F2 as shown on screen).
- Confirm the CPU model, RAM capacity, and the SSD appear.
- Enable the memory profile (XMP on Intel and many boards, EXPO on AMD) so the RAM runs at its rated speed.
- Check that CPU temperature at idle is plausible, typically well below 50 degrees Celsius for a properly mounted cooler. If it climbs fast, shut down and reseat the cooler.
- Confirm Secure Boot capability and TPM 2.0 (listed as fTPM on AMD or PTT on Intel), because Microsoft lists both as Windows 11 requirements.
- Save and exit, then boot from the Windows USB drive to install.
If it does not POST
| Symptom | Most likely cause | Fix |
|---|---|---|
| No fans, no lights | PSU switch off, 24-pin or front-panel power connector loose | Check the PSU switch and power cord, reseat the 24-pin, check the power button header |
| Fans spin, no display | Monitor connected to the motherboard instead of the GPU, GPU not seated, or CPU EPS cable missing | Move the cable to the GPU, reseat the card, connect the CPU 8-pin |
| Boots, then resets in a loop | RAM not fully seated or a memory profile that is too aggressive | Reseat RAM, try one stick at a time, clear CMOS |
| Debug LED shows DRAM or CPU | RAM or CPU seating problem | Follow the LED code table in the motherboard manual |
| CPU temperature spikes | Cooler not seated, plastic film left on the cold plate | Remove the cooler, check for film, remount |
Stage 5: After the install
A finished build is not ready until the software side is done. Treat this as part of the new gaming pc setup checklist, because a PC with a default display refresh rate and no graphics driver can feel slow even when the hardware is fine.
| Task | Details |
|---|---|
| Install Windows 11 and sign in | Use media created with Microsoft’s Media Creation Tool; Windows 11 Home needs an internet connection and a Microsoft account during setup |
| Run Windows Update fully | Reboot and repeat until no updates remain |
| Install the chipset driver | From AMD or Intel, or the motherboard maker’s support page |
| Install the graphics driver | Download directly from NVIDIA, AMD or Intel |
| Set the monitor refresh rate | In Windows display settings, choose the monitor’s highest refresh rate |
| Check RAM speed | Task Manager’s Performance tab shows the memory speed; it should match the profile you enabled |
| Check temperatures under load | Use a monitoring utility and play a demanding game for 20 to 30 minutes |
| Update the BIOS if a stable newer version exists | Follow the motherboard maker’s procedure and never power off during a flash |
| Create a restore point and note the licence account | Gives a baseline for troubleshooting |
Windows licensing is the item beginners forget. A new build has no operating system, so you need either a retail licence, a system-builder (OEM) licence sold for PCs you assemble, or an existing digital licence linked to your Microsoft account if you are rebuilding. Windows 10 reached end of support on October 14, 2025, so a new build should use Windows 11.
Common mistakes and how the checklist prevents them
| Mistake | Checklist item that prevents it |
|---|---|
| Buying RAM the board cannot use | Stage 1 platform table |
| Cooler that hits the side panel | Stage 1 physical fit table |
| Forgetting the CPU power cable | Stage 3 cable table |
| Monitor on the motherboard port | Stage 4 first boot step |
| RAM at a default speed far below its rating | Stage 4 BIOS profile step |
| No network after install | Stage 2 downloads on a second computer |
Print or copy the tables, and tick each box with a pencil. It sounds old-fashioned, but a physical checklist beats memory when you are three screws deep in a case.
How we compared
We compared manufacturer manuals, specifications and independent guides named below. We did not build or benchmark these systems ourselves.
Sources
- Microsoft, Windows 11 specifications and system requirements
- Microsoft support, Windows 10 support end-of-life notice
- AMD, AM5 platform and Ryzen desktop processor specifications
- Intel, Core Ultra 200S and 12th to 14th Gen Core desktop product specifications
- Motherboard manufacturer manuals (ASUS, MSI, Gigabyte, ASRock) for header locations and BIOS procedures
- PCI-SIG and PC power supply makers’ documentation on the 12V-2×6 connector
- PCPartPicker compatibility documentation
Frequently Asked Questions
What is the correct order to build a PC?
Mount the CPU, RAM, M.2 drive and cooler on the motherboard outside the case, then install the board in the case, fit the power supply and cables, and install the graphics card last. Building the delicate parts first makes them easier to see and reach.
Do I need thermal paste?
Many coolers ship with paste pre-applied. If yours does not, a pea-sized dot in the center of the CPU is enough. Too much paste can ooze over the socket, and too little can leave gaps.
Why does my new PC have no display?
The two most common causes are a monitor cable in the motherboard port instead of the graphics card, and an unseated RAM stick or graphics card. Check those two before anything else.
Should I update the BIOS on a new build?
Update it if the motherboard needs a newer version to support your CPU, or if the manufacturer lists a stability or memory fix you need. Otherwise, update once the system is stable, and never turn off power during a flash.
How much power supply headroom do I need?
A simple planning rule is to add roughly 30 to 40 percent above your calculated component load, then round up to the next standard rating. Check the graphics card maker’s recommended PSU figure as well.
Do I need an anti-static wrist strap?
Not strictly. Touching the bare metal of the case or the PSU before handling parts and working on a non-carpeted surface is the standard approach in most manufacturer guides.
How long does a first PC build take?
Plan for roughly an afternoon: a few hours for assembly and another one or two for Windows, drivers and updates. Rushing is the main cause of skipped steps.
What should I check after the build is finished?
Confirm the RAM runs at its rated speed, the monitor is set to its highest refresh rate, Windows and drivers are up to date, and temperatures stay reasonable during a long game session.