Key takeaways
- Use 90%+ isopropyl alcohol—lower concentrations leave water residue.
- Clean both the CPU and the cooler base, not just one.
- Let everything dry completely before applying new paste.
Thermal paste is the thin layer that bridges the microscopic gaps between your CPU’s heat spreader and the cooler’s base, and applying it correctly can mean the difference between a chip that runs at 70°C and one that throttles at 95°C. It is a five-minute task that intimidates first-timers, but the process is simple once you understand what the paste actually does: it fills air gaps, because air is a terrible conductor of heat. In 2026, with CPUs pushing more heat than ever, a clean application of a quality compound is one of the best free performance moves you can make.
This guide walks through removing old paste, choosing the right compound, the application method that works every time, and mounting the cooler with even pressure. You do not need to spread the paste manually or use exotic patterns—the cooler’s own pressure does the work. Get this right and you will never think about it again for years.
Our top picks




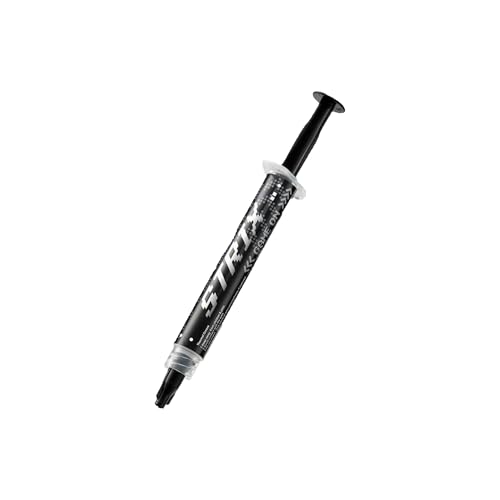
As an Amazon Associate we earn from qualifying purchases at no extra cost to you. Ratings are shown as listed on Amazon.
⚡ Save on Your Next PC — Amazon Prime
Prime members get fast free shipping on the systems above, plus early access to Prime Day & Black Friday PC deals. New members get a 30-day free trial.
Watch: How to Apply Thermal Paste Correctly — Video Review
Choose the Right Thermal Paste
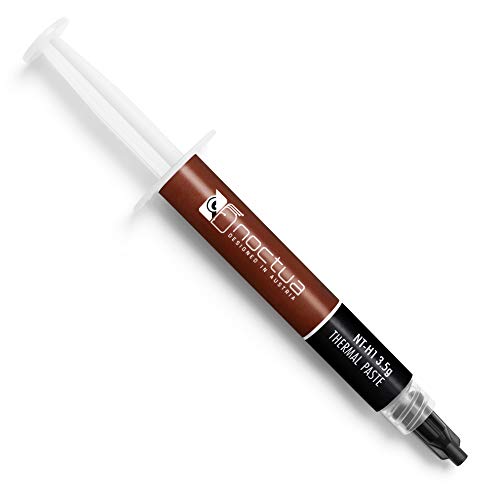
For gaming CPUs, a high-quality non-conductive ceramic or carbon-based paste is the safe, high-performance choice. Noctua NT-H1 and NT-H2 are famously reliable and forgiving, while Thermal Grizzly Kryonaut delivers top-tier conductivity for hot chips and overclocks. Both come with cleaning wipes in kit form, which saves a trip for isopropyl alcohol. Avoid liquid metal unless you are experienced—it conducts electricity and can short components or stain an aluminum cooler.
Remove the Old Paste
If you are reseating a cooler, clean off every trace of old, dried paste first. Wipe the CPU heat spreader and the cooler base with a lint-free cloth or coffee filter dampened in 90%+ isopropyl alcohol, then follow with a dry pass. The surfaces must be spotless and dry before you apply fresh compound—leftover residue creates gaps that hurt heat transfer. Kits like Noctua’s and Thermal Grizzly’s include wipes sized exactly for this.
- Use 90%+ isopropyl alcohol—lower concentrations leave water residue.
- Clean both the CPU and the cooler base, not just one.
- Let everything dry completely before applying new paste.
Apply the Right Amount
The classic method: place a single pea-sized dot in the center of the CPU heat spreader. That is it—do not spread it. When you mount the cooler, its pressure squeezes the dot evenly outward to cover the surface, pushing out air without trapping bubbles. Too much paste is messy and can ooze over the edges; too little leaves uncovered corners. For larger rectangular heat spreaders (like some AMD chips), a thin line or two small dots ensures full coverage.
Mount the Cooler Evenly
Lower the cooler straight down onto the CPU without sliding it—sliding smears the paste and traps air. Once it contacts the surface, tighten the mounting screws in a diagonal cross pattern, a couple of turns each, alternating corners so pressure builds evenly across the whole spreader. Even, moderate pressure spreads the paste in a uniform layer. Do not over-torque; the goal is firm and flat contact, not maximum force.
Verify Your Temperatures
After mounting, boot and run a monitoring tool alongside a short stress test. A good application shows all cores within a few degrees of each other and load temperatures comfortably below throttle. If one core runs much hotter than the rest, contact is uneven—remount with fresh paste and check your mounting pressure. On AMD AM5, a contact frame can flatten the spreader for more consistent core temperatures.
Tips
- A pea-sized dot is right for most CPUs—resist the urge to spread it manually.
- Mount straight down and tighten in a cross pattern for even pressure.
- Reapply paste every 2-4 years, or whenever you remove the cooler.
- Keep the tube—a single application uses very little, so one tube lasts many builds.
Frequently Asked Questions
How much thermal paste should I use?
A single pea-sized dot in the center of the CPU is the reliable standard for most processors. The cooler’s mounting pressure spreads it evenly and pushes out air. Larger rectangular heat spreaders may need a thin line or two small dots for full coverage, but more paste is not better—excess just oozes out the sides.
Do I need to spread the paste myself?
No. The dot-in-the-center method lets the cooler’s pressure spread the paste as you mount it, which avoids trapping air bubbles that manual spreading can introduce. Spreading by hand is unnecessary and often worse. Just place the dot, lower the cooler straight down, and tighten evenly.
What can I use to clean off old thermal paste?
90%+ isopropyl alcohol on a lint-free cloth or coffee filter is the standard. It dissolves old paste cleanly and evaporates without residue. Many paste kits, like those from Noctua and Thermal Grizzly, include purpose-made cleaning wipes. Make sure both surfaces are completely dry before applying fresh compound.
How often should thermal paste be replaced?
Every two to four years for most systems, or any time you remove the cooler. Paste dries out gradually and loses conductivity, causing temperatures to creep up. If your CPU is running hotter than it used to and it is a few years old, a fresh application often recovers 5-10°C.
Conclusion
Applying thermal paste is one of the simplest yet most impactful maintenance tasks in PC building. Clean both surfaces with isopropyl alcohol, place a pea-sized dot of a quality compound like NT-H1 or Kryonaut, mount the cooler straight down, and tighten in a cross pattern for even pressure. Verify your core temperatures, and you have a CPU running as cool as its cooler allows—no guesswork required.