Key takeaways
- A 25 mm eyepiece gives 1,200 ÷ 25 = 48×.
- A 10 mm eyepiece gives 1,200 ÷ 10 = 120×.
- A 6 mm eyepiece gives 1,200 ÷ 6 = 200×.
The best telescopes for beginners and experts are chosen by matching aperture and focal length to your targets, then selecting a mount you can carry, align, and use without frustration.
Quick picks by observing goal
| What you want to observe | Best-fit telescope type | Useful aperture | Why it works |
|---|---|---|---|
| Moon, planets, and double stars | Refractor or Maksutov-Cassegrain on a steady alt-azimuth mount | 80–150 mm | Longer focal lengths produce sharp, high-contrast views and make tracking easier |
| Galaxies, nebulae, and star clusters | Newtonian Dobsonian reflector | 150–300 mm | Large aperture gathers substantially more light for the money |
| Casual stargazing and travel | Compact tabletop reflector or short-tube refractor | 70–130 mm | Fast setup and low weight encourage frequent use |
| Assisted deep-sky observing | Smart telescope with an integrated camera | Approximately 50–80 mm optical aperture | App-based pointing and electronically assisted viewing reveal faint objects from less-than-ideal skies |
Best beginner telescope: a portable 100–130 mm reflector
A 100–130 mm Newtonian reflector is usually the strongest first telescope because it shows the Moon’s craters, Jupiter’s cloud bands, Saturn’s rings, bright nebulae, open clusters, and several brighter galaxies without requiring a complicated setup. The Sky-Watcher Heritage-130P is a particularly practical example: its collapsible tabletop design offers useful aperture while remaining easier to transport than a full-size Dobsonian.
Our top picks


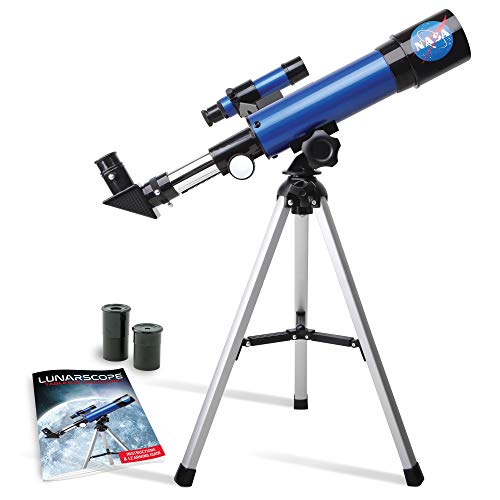
As an Amazon Associate we earn from qualifying purchases at no extra cost to you. Ratings are shown as listed on Amazon.
The trade-off is that a tabletop reflector needs a stable surface. A camping table, sturdy bench, or solid wooden platform is much better than a lightweight folding tray. Its short focal length gives wide views, which are excellent for star clusters and nebulae, but high-power planetary viewing requires suitable eyepieces and careful focusing.
For beginners who prefer a tripod and guided navigation, the Celestron StarSense Explorer LT 114AZ and StarSense Explorer DX 130AZ are sensible alternatives. Their smartphone-assisted pointing system can reduce the difficulty of locating targets, although the phone is not looking through the telescope; it helps identify where to aim.
When to choose a refractor instead
An 80–102 mm refractor is a good choice if you value low maintenance, quick setup, and crisp lunar or planetary views. Refractors do not require mirror collimation, and their closed optical tubes are less exposed to dust. An achromatic refractor with a short focal ratio can show noticeable purple fringing around very bright objects, while a longer-focus achromat or apochromatic refractor controls color better but costs more.
For most first-time buyers, avoid paying for a very lightweight tripod paired with a large optical tube. A smaller telescope on a stable mount is more useful than a larger one that shakes every time the focusing knob is touched.
Best telescope for deep-sky viewing: a 6- to 10-inch Dobsonian
If your priority is faint nebulae, globular clusters, and galaxies, aperture matters more than electronic features. A 6-inch Dobsonian is a manageable starting point; an 8-inch model is often the best balance of light-gathering ability, cost, and portability. A 10-inch Dobsonian shows more detail but becomes noticeably bulkier, particularly if you need to carry it down stairs or load it into a small car.
The Sky-Watcher Classic 200P, an 8-inch Dobsonian, represents this category well. Its simple alt-azimuth base avoids the alignment and battery requirements of motorized systems. You point it by hand, follow objects across the sky, and learn the constellations as you observe. That simplicity also leaves more of the budget for eyepieces, a red flashlight, and a comfortable observing chair.
Dobsonians are not ideal for long-exposure astrophotography because their basic mounts do not track the sky. They can still provide spectacular visual views, and they are excellent for electronically assisted observing when paired with appropriate equipment, but serious deep-sky imaging calls for a motorized equatorial mount or a dedicated smart telescope.
Best compact planetary telescope: a Maksutov-Cassegrain
A Maksutov-Cassegrain is a strong match for observers with limited storage who mainly want the Moon, planets, and double stars. The Sky-Watcher Skymax 127 is a representative example, with a long effective focal length in a short physical tube. Its compact shape is convenient, but the narrow field of view makes large nebulae and sprawling star clusters difficult to frame.
Maksutovs also need time to reach the outdoor temperature. Taking one from a warm room into cold night air can produce soft, unstable images until the internal air and optics cool. Allow roughly 20–45 minutes for thermal adjustment, depending on the temperature difference and tube size. Covering the tube while it cools helps prevent accidental dew and dust exposure.
Best advanced all-rounder: an 8-inch Schmidt-Cassegrain
The Celestron NexStar 8SE is a versatile option for an experienced beginner or an observer who wants computer-assisted pointing and automatic tracking. Its 8-inch aperture is large enough for rewarding visual deep-sky work, while its long focal length suits lunar and planetary observing. The motorized mount can keep an object centered, which is useful when sharing the view with several people.
Its compromises are important. The single-arm mount and tripod are more complex than a Dobsonian, the system depends on battery power, and accurate alignment takes practice. The long focal length also produces a relatively narrow field. A 32 mm, 1.25-inch eyepiece gives a practical low-power view, but it will not frame very large objects such as the full Andromeda Galaxy or the entire Pleiades cluster as easily as a short-focus telescope.
Best low-effort deep-sky option: a smart telescope
A smart telescope such as the ZWO Seestar S50 is designed for people who want to locate and record deep-sky targets through an app rather than manually star-hop with an eyepiece. Its integrated camera can build an image over time, making nebulae and galaxies visible even when direct visual viewing through a small aperture would be subtle.
This is not a replacement for a traditional telescope in every situation. It is less satisfying for someone who wants a direct eyepiece view of Saturn, and its results depend on sky brightness, weather, focus, calibration, and exposure time. It is best understood as a compact automated imaging system that also supports accessible observing.
How to match the specifications to your targets
1. Start with aperture
Aperture is the diameter of the main lens or mirror. Light-gathering ability rises with the area of that opening, so it scales approximately with the square of aperture. Compared with a 100 mm telescope, a 200 mm telescope has:
(200 ÷ 100)² = 4
That means roughly four times the light-gathering area, assuming similar optical efficiency. The larger instrument can reveal fainter objects and resolve finer detail, although light pollution, atmospheric turbulence, optical quality, and the observer’s experience still matter.
2. Calculate useful magnification instead of trusting the maximum claim
Magnification equals the telescope’s focal length divided by the eyepiece focal length. For an 8-inch Dobsonian with a 1,200 mm focal length:
- A 25 mm eyepiece gives 1,200 ÷ 25 = 48×.
- A 10 mm eyepiece gives 1,200 ÷ 10 = 120×.
- A 6 mm eyepiece gives 1,200 ÷ 6 = 200×.
In practice, 120× may be more useful than 200× on a typical night because atmospheric turbulence often blurs high-power views. A useful working budget is approximately 30–50× per inch of aperture under ordinary conditions, with higher powers reserved for steady air and well-cooled optics. A telescope advertised with extreme “maximum magnification” is not automatically better.
3. Choose the mount before adding accessories
- Tabletop alt-azimuth: cheapest and portable, but it requires a sturdy support.
- Tripod alt-azimuth: intuitive for casual viewing and terrestrial use; stability is the main concern.
- Motorized alt-azimuth: convenient for tracking and sharing views, but needs batteries and alignment.
- Equatorial: useful for long-exposure imaging, though polar alignment and counterweights increase setup time.
- Dobsonian: gives the most aperture per dollar for visual observing, with minimal mechanical complexity.
Decision guide for common buyers
| Your situation | Recommended class | Choose this over a larger model when… |
|---|---|---|
| Apartment, balcony, or frequent travel | 80–100 mm refractor or 100–130 mm tabletop reflector | Storage and setup time determine whether you will actually observe |
| Dark rural sky and visual deep-sky interest | 8-inch Dobsonian | You want the most visual capability without electronics |
| Mostly Moon and planets | 100–127 mm Maksutov or longer-focus refractor | You prefer a compact tube and narrow, high-power views |
| Family sharing and easy target finding | Computerized 6–8-inch Schmidt-Cassegrain or guided alt-azimuth system | Keeping objects centered matters more than instant setup |
| Phone-based deep-sky images | Smart telescope | You want automated locating and image stacking rather than eyepiece observing |
Setup details that make a bigger difference than expected
Allow every telescope to reach outdoor temperature, use a red light to preserve night vision, and begin with the lowest-power eyepiece. Centering a target at low power gives you a wider search area; increase magnification only after the object is sharp and stable. For a Dobsonian, gently nudge the tube rather than forcing it, and check that the base moves smoothly before observing.
Collimate a Newtonian reflector when needed, especially after transport. A simple sight tube or laser collimator can help, but the tool must itself be aligned. If stars look like small comets rather than points, check focus, collimation, tube cooling, and atmospheric conditions before blaming the aperture.
Finally, budget for a comfortable observing chair and one or two sensible eyepieces. A 25 mm eyepiece for finding objects, a 10–12 mm eyepiece for moderate detail, and a 2× Barlow lens can cover many beginner targets without filling a case with redundant accessories.