Key takeaways
- Your Target Connection Type: Determine whether you need a high-throughput video streaming bridge (such as a dedicated Wi-Fi 6E/7 airlink bridge for standalone headsets), a low-bandwidth SteamVR watchman dongle (for pairing Vive trackers or Index controllers), or a dedicated PC display conversion box. Hardware built for 2.4 GHz controller tracking cannot stream full video frames, and vice versa.
- Your Desk Real Estate & Placement Strategy: High-frequency VR wireless signals cannot pass through solid metal PC towers, dense wooden desks, or glass monitor stands. Decide if you have space for an elevated desk dock, a clip-on monitor mount, or an extended cable setup that keeps the transceiver at line-of-sight height (4 to 6 feet off the floor).
- Your PC’s Power & Port Availability: High-performance wireless VR transceivers draw continuous power and require stable data lanes. Verify whether your host computer has an available USB 3.2 Gen 2 (10 Gbps) port capable of supplying 900mA to 1500mA of continuous power, or if you need an adapter kit with an external AC wall adapter.
Setting up a wireless PC VR rig promises total immersion without the tripping hazard of heavy tether cables. However, connecting a standalone headset or SteamVR peripheral to your computer requires a rock-solid, low-latency communication bridge. Far too many users run into frustrating frame drops, sudden tracking drift, or thermal dropouts simply because they picked the wrong device. When evaluating what to look for in a PC VR wireless adapter, buyers frequently make critical mistakes: underestimating thermal throttling in tiny plastic dongles, plugging high-bandwidth transceivers into overloaded USB hubs, or confusing basic 2.4 GHz controller receivers with high-throughput 6 GHz video streaming bridges.
A successful VR room setup blends smart network hardware with clean desk aesthetics and ergonomic placement. To ensure smooth, stutter-free PC VR gameplay, you need to understand signal protocols, physical heat dissipation, bus power demands, and line-of-sight requirements before clicking buy.
Our top picks
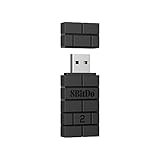
![Warrky PSVR2 PC Adapter, PSVR2 Accessories [Aluminum Shell, Upgraded IC]](https://m.media-amazon.com/images/I/41Wxu8lG+nL._SL500_.jpg)


As an Amazon Associate we earn from qualifying purchases at no extra cost to you. Ratings are shown as listed on Amazon.
Decide These 3 Things First
Before comparing specific models or shell materials, narrow down your exact hardware requirements by deciding on these three foundational factors:
- Your Target Connection Type: Determine whether you need a high-throughput video streaming bridge (such as a dedicated Wi-Fi 6E/7 airlink bridge for standalone headsets), a low-bandwidth SteamVR watchman dongle (for pairing Vive trackers or Index controllers), or a dedicated PC display conversion box. Hardware built for 2.4 GHz controller tracking cannot stream full video frames, and vice versa.
- Your Desk Real Estate & Placement Strategy: High-frequency VR wireless signals cannot pass through solid metal PC towers, dense wooden desks, or glass monitor stands. Decide if you have space for an elevated desk dock, a clip-on monitor mount, or an extended cable setup that keeps the transceiver at line-of-sight height (4 to 6 feet off the floor).
- Your PC’s Power & Port Availability: High-performance wireless VR transceivers draw continuous power and require stable data lanes. Verify whether your host computer has an available USB 3.2 Gen 2 (10 Gbps) port capable of supplying 900mA to 1500mA of continuous power, or if you need an adapter kit with an external AC wall adapter.
1. Form Factor, Footprint, and Cable Mounting
When selecting hardware for your workspace, physical size dictates both aesthetic integration and signal efficiency. PC VR wireless hardware generally falls into three design profiles:
Compact USB dongles typically measure around 2.5 x 0.8 x 0.4 inches (63 x 20 x 10 mm) and weigh under 1 ounce (28 grams). These are ideal for space-saving setups, but plugging them directly into the rear I/O panel of a desktop computer isolates the internal antenna behind a metal chassis, causing signal attenuation. Mid-sized desktop bridge units measure roughly 4.5 x 3.2 x 1.2 inches (114 x 81 x 30 mm) with a weight of 5 to 7 ounces (140 to 200 grams), featuring built-in tilt stands or threaded 1/4-inch tripod mounts. For optimal performance, look for adapters that include or support a 3-foot to 6.5-foot (1 to 2 meter) shielded USB extension cable, allowing you to position the transceiver clear of desk clutter and directly facing your active play space.
2. Material Shell Construction and Thermal Management
Wireless VR transceivers operate under relentless data loads. Video streaming bridges process between 150 Mbps and 2400 Mbps of continuous data, generating internal temperatures that easily breach 125°F (52°C). If the housing cannot dissipate this heat, the internal integrated circuits (ICs) will automatically throttle performance, leading to sudden latency spikes, dropped frames, or complete disconnections mid-session.
Prioritize adapters constructed with an aluminum alloy shell (such as anodized 6063 aluminum) or high-grade flame-retardant ABS featuring active ventilation grilles. An aluminum housing acts as a passive heatsink, drawing heat away from the main chipset and dispersing it across the outer chassis. If you opt for a compact ABS plastic adapter, ensure it incorporates internal copper thermal pads and dedicated air vents. Avoid completely sealed, smooth plastic enclosures for high-bandwidth streaming tasks, as they trap heat and shorten the operational lifespan of the internal components.
3. Signal Bands, Throughput, and Latency Thresholds
Wireless VR demands extreme stability. Unlike standard video streaming where a two-second buffer is acceptable, VR motion-to-photon latency must remain under 15 milliseconds (ideally between 5ms and 8ms over the wireless transport link) to prevent motion sickness.
As streaming standards mature, choosing the correct radio frequency band is paramount:
- 2.4 GHz Band: Limited to roughly 300 Mbps throughput. Highly congested; strictly reserved for low-data SteamVR controller/tracker dongles using custom Watchman protocols.
- 5 GHz Band (Wi-Fi 5/6): Offers 866 Mbps to 1200 Mbps throughput. Suitable for standard compressed video streaming, provided no other home devices share the channel.
- 6 GHz Band (Wi-Fi 6E / Wi-Fi 7): Delivers 2400 Mbps+ throughput with virtually zero local interference. This is the gold standard for clean, uncompressed-quality wireless PC VR streaming, providing an operational range of 3 to 15 feet in direct line-of-sight setups.
4. Power Draw and USB Bus Compatibility
Power instability is a silent killer of wireless PC VR performance. A high-throughput wireless VR adapter or PC conversion bridge consumes between 4.5 Watts and 12 Watts of continuous power depending on signal strength and processing load. Standard USB 2.0 ports cap power output at 2.5W (5V/0.5A), which is insufficient for streaming hardware and will lead to constant reboots.
Ensure your chosen adapter connects via USB 3.2 Gen 1 or Gen 2 (5 Gbps to 10 Gbps) supplying at least 5V/0.9A (4.5W) to 5V/2A (10W). For heavy-duty display conversion or long-distance transceivers, select units featuring a dedicated DC 12V/1.5A power input. If your desktop setup relies on a multi-device USB hub, ensure the hub is independently powered via a dedicated wall outlet rather than relying on host bus power.
5. Price Tiers and Value Expectations
Understanding realistic market pricing prevents you from overpaying or buying underpowered clone hardware:
- Budget Tier ($20 – $35): Includes single-purpose 2.4 GHz SteamVR controller/tracker dongles, basic PC display converter boxes, and entry-level aluminum-cased USB adapters. Expect basic passive cooling and short cable leads.
- Mid-Range Tier ($40 – $90): Covers dedicated Wi-Fi 6 wireless VR bridges, dual-band PC VR streaming receivers, and upgraded aluminum adapters featuring active thermal management and premium chipset components.
- Premium Tier ($100 – $250+): Offers high-performance Wi-Fi 6E/7 dedicated wireless transceivers, zero-latency proprietary wireless transmission systems, multi-antenna arrays, integrated desk docks, and comprehensive software suites.
6. Build Certification, Driver Support, and Warranty Coverage
Because these adapters sit between your expensive host PC and VR headset, electronics safety matters. Verify that the hardware carries valid safety certifications such as FCC, CE, and RoHS compliance. Uncertified gray-market power components can cause electrical interference or damage your motherboard’s USB controllers.
On the software side, confirm that the manufacturer provides signed Windows drivers that update seamlessly without requiring you to disable system security features. Look for product warranties offering a minimum of 12 to 24 months of coverage, backed by responsive customer support that releases regular firmware patches to maintain compatibility with ongoing VR runtime updates.
7. Setup Ergonomics, Unboxing, and Cable Management
A great PC VR adapter should seamlessly integrate into your gaming desk or room ecosystem. Unboxing a quality unit should yield the adapter, mounting hardware (such as non-marking adhesive pads, monitor clips, or mini-tripods), and high-flex shielded cables.
Avoid rigid, thick cables that pull small adapters off your desk or torque the USB ports on your PC chassis. Look for silicone or soft-braided nylon cables with reinforced strain relief collars at the connector ends. If you are wall-mounting or setting up a dedicated VR room, choose adapters with clear LED status indicators (power, pairing, and link quality) positioned on the front or top face so you can diagnose connectivity issues at a glance without interrupting your session.
Spec Checklist
| Spec / Feature | Budget Tier ($20–$35) | Mid-Range Tier ($40–$90) | Premium Tier ($100–$250+) |
|---|---|---|---|
| Primary Technology | 2.4 GHz Watchman / USB 3.0 Conversion | Dedicated Wi-Fi 6 / Dual-Band Bridge | Wi-Fi 6E / Wi-Fi 7 / Proprietary Direct-Link |
| Max Data Rate | Up to 300 Mbps (Control) / 5 Gbps (Cable) | 1200 Mbps – 1800 Mbps | 2400 Mbps – 4800 Mbps+ |
| Expected Transport Latency | N/A (Control Only) or < 15ms | 8ms – 12ms | 3ms – 7ms |
| Shell Material & Cooling | ABS Plastic / Basic Aluminum Shell | Anodized Aluminum + Passive Vents | Machined Aluminum + Thermal Pads / Fan |
| Power Requirement | USB Bus Powered (5V/0.5A – 0.9A) | USB Bus Powered (5V/1.5A – 2A) | External DC Power Adapter (12V/1.5A) |
| Recommended Line-of-Sight Range | 3 to 5 Feet | 5 to 10 Feet | 10 to 20 Feet |
Red Flags
Watch out for these warning signs when shopping for a wireless PC VR adapter:
- Sealed, All-Plastic High-Speed Adapters: High-bandwidth data processing generates heat. Devices claiming 1200 Mbps+ throughput enclosed in small, completely unvented plastic casings will likely drop signal due to thermal throttling within 20 to 30 minutes of play.
- Vague “High Speed” Labels Without Band Details: Products that advertise “Ultra-Fast VR” without explicitly listing supported frequencies (5 GHz / 6 GHz) or USB protocols (USB 3.2 Gen 1/2) are often rebadged 2.4 GHz legacy Wi-Fi dongles unfit for modern VR streaming.
- Lack of Included Extension Cables for Dongles: A direct USB-A stick adapter plugged straight into the back of a metal PC tower creates severe radio interference. If the manufacturer does not include an extension cable or dock, factor that additional cost into your purchase.
- Unsigned Drivers or Manual Driver Bypasses: Avoid devices that require you to disable Windows Driver Signature Enforcement or download unsigned `.exe` files from untrusted cloud storage links.
- Loose or Unreinforced Port Connectors: Inline adapter boxes that lack strain relief on tether leads are prone to internal solder cracks under repeated bending.
FAQ
How far away from my PC can I place a VR wireless adapter?
For high-throughput video streaming bridges (5 GHz / 6 GHz), keep the adapter within 5 to 15 feet of your play area with an unobstructed line of sight. Physical obstacles like walls, furniture, or metal PC cases degrade high-frequency signals rapidly. For 2.4 GHz SteamVR controller dongles, line-of-sight range extends up to 20 feet, though keeping them elevated and within 6 to 10 feet yields optimal tracking responsiveness.
Do I need a dedicated VR wireless adapter if I already have a fast Wi-Fi router?
While a fast home router can handle VR streaming, sharing that router with phones, smart TVs, and household traffic introduces bandwidth congestion and latency spikes. A dedicated PC VR wireless adapter creates a direct, isolated peer-to-peer connection between your computer and headset, ensuring stable frame rates and lower latency regardless of overall household internet usage.
Why does my VR wireless adapter get warm or hot to the touch during play?
It is normal for compact wireless transceivers to feel warm (between 100°F and 120°F / 38°C to 49°C) during extended play sessions. Devices with aluminum alloy housings are specifically designed to transfer heat away from internal chipsets to the outer surface. However, if the adapter becomes too hot to comfortably hold, or if you experience sudden frame rate drops after 15–20 minutes of play, the unit is overheating and requires better ventilation or an external cooling setup.
Can I plug a PC VR wireless adapter into a standard USB hub?
You should avoid unpowered USB hubs, as high-bandwidth wireless adapters draw significant continuous power and data throughput. Plugging an adapter into a crowded, unpowered hub can cause low-voltage disconnects, severe tracking lag, or audio distortion. If you must use a hub, select an independently powered USB 3.2 Gen 2 hub with its own dedicated AC wall transformer to guarantee steady current and bandwidth.